Delicious Mixed Berry Galette: Your Perfect Summer Tart
This delectable summer galette is not only simple to make but will also disappear before your eyes! Be prepared for rave reviews!
This delightful, free-form Mixed Berry Galette recipe can be adjusted to feature just one type of berry or your favorite fruit. It’s the ideal dessert for summer gatherings!
Why You Must Make This Galette
This summery Berry Galette first made its debut at a dinner party I co-hosted back in 2012. I thought it would be a delightful addition to the dessert spread, alongside recipes from the beloved cookbook “Baking with Julia,” penned by the talented Flo Braker.
With friends and family eagerly sampling my dessert offerings, I had plenty of honest feedback ready at hand. Here’s why this galette won their hearts:
- It’s incredibly easy to whip up, allowing for a variety of fruit or fruit combinations.
- Preparation is a breeze compared to making a traditional pie or fruit tart.
- The rustic nature of a galette allows for a relaxed approach—perfection is not required!
- Everyone loved it! I am certain your guests will too.
Ingredient Notes
- Kitchen Staples: All-Purpose Flour, Granulated Sugar, and Table Salt.
- Sour Cream: Cold from the refrigerator—it’ll help keep the dough nice and cool. Feel free to swap it for yogurt or buttermilk, noting that you’ll need less buttermilk due to its liquid content.
- Ice Water: Chill water with ice cubes for optimal temperature while you prepare the rest of your ingredients.
- Unsalted Butter: Keep it cold to ensure a delightfully flaky crust. If using salted butter, reduce the amount of salt in the recipe by half.
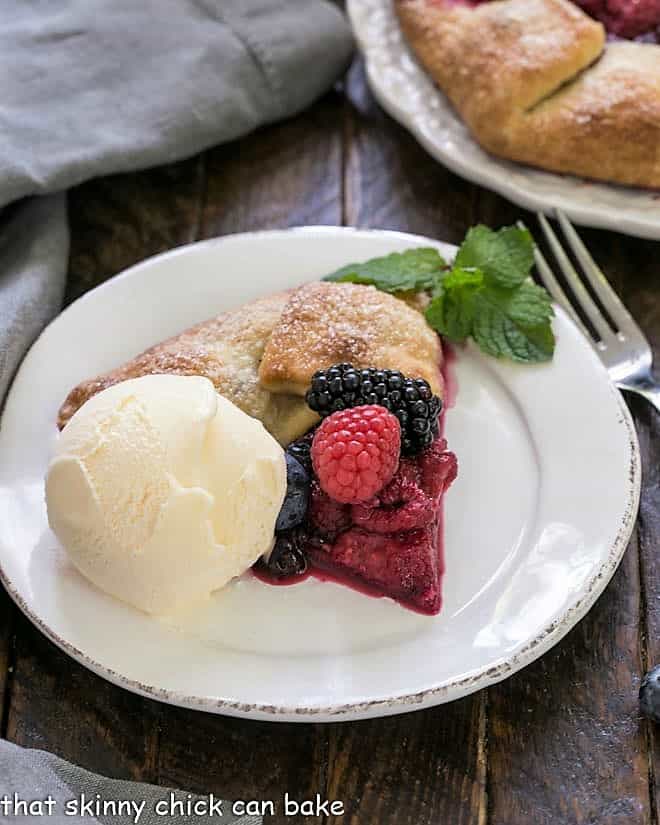
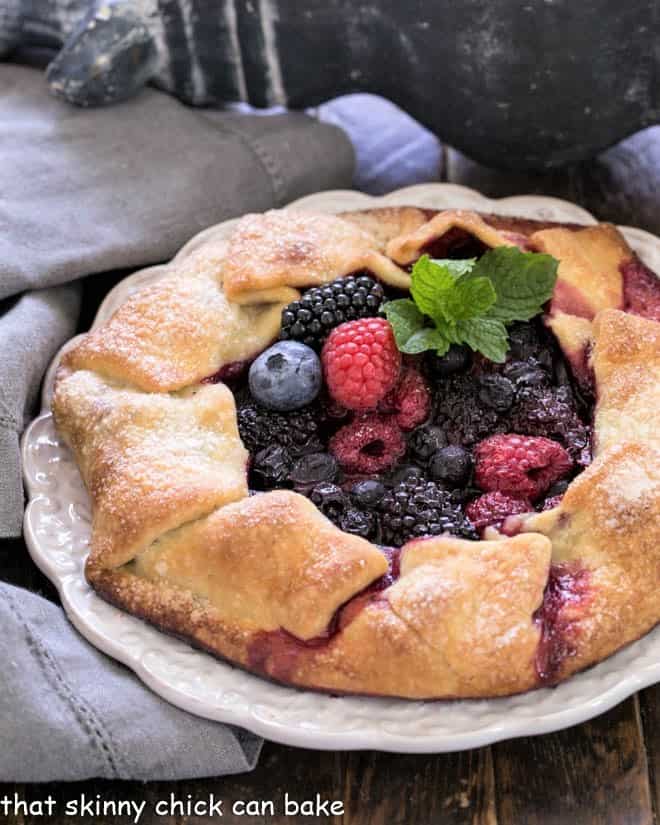
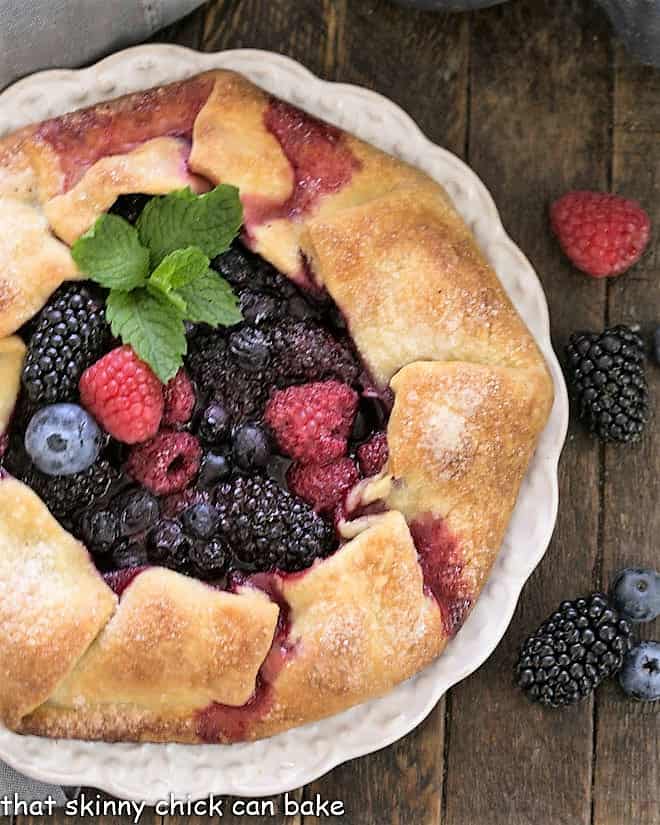
- Mixed Fresh Berries: Use whatever berries look fantastic at the market or your favorites. I recommend blackberries, raspberries, and blueberries—but feel free to experiment with sliced, peeled fruits as well.
- Honey: An optional ingredient, honey adds a touch more sweetness and flavor.
Recipe Tips
- The dough is quite soft and easy to manage, especially if you have a well-floured work surface. Adding yellow cornmeal gives the crust a delightful crunch.
- If you find yourself baking on a hot summer day, simply return the dough to the refrigerator if it begins to warm up.
- Mix blueberries, raspberries, and blackberries with honey and sugar before dotting with butter for a delectable filling that bakes to perfection.
- PRO-Tip: Use a mixing bowl as a template for cutting out a round piece of dough. It’s helpful to leave a 2-3 inch border around the filling to make folding easier.
- Whether you use mixed berries or just one type, prioritize selecting fragrant, plump fruits for the best results. This galette serves about 4 to 6, so consider that when planning your dessert spread.
- The dough recipe yields enough for two galette crusts. Feel free to make a second one or freeze the leftover dough for future desserts!
Instructions
- To prepare the dough in a food processor, mix sour cream and ⅓ cup of ice water in a small bowl and set aside.
- Combine all-purpose flour, cornmeal, sugar, and salt in the food processor; pulse to mix well.
- Add cold butter pieces and pulse 8 to 10 times until the mixture has crumbly bits ranging from breadcrumbs to pea-sized.
- While the processor is running, gradually add the sour cream mixture and blend until soft curds form.
- Remove the dough, divide it in half, and shape each portion into a disk. Wrap them in plastic wrap and chill for at least 2 hours.
- Position a rack in the lower third of the oven and preheat it to 400°F (200°C). Line a baking sheet with parchment paper.
- Flour your work surface and roll out the dough into an 11-inch circle, about ⅛-inch thick. Lift and re-flour as needed.
- Roll the dough around your rolling pin and transfer it to the prepared baking sheet.
- Spread the mixed berries over the dough, leaving a 2 to 3-inch border. Sprinkle 1 tablespoon of sugar and drizzle honey on top if desired.
- Cut the butter into small pieces and scatter them over the berries.
- Fold the edges of the dough up over the filling, creating pleats as you go around the galette.
- Use a pastry brush to lightly coat the crust edge with water, then sprinkle the remaining sugar over the crust.
- Bake for 35 to 40 minutes, or until the pastry is golden brown and crisp.
- Remove the baking sheet from the oven and let the galette cool for about 10 minutes.
- Carefully transfer it to a cooling rack.
- Serve warm or at room temperature and enjoy!
Frequently Asked Questions
What is a Galette?
A galette is a rustic French pastry that’s like a pie or tart. The Italian version is known as crostata. It involves folding a pastry dough around a sweetened fruit filling, but it can also be savory. Plus, it doesn’t require a special baking dish!
Can a Fruit Tart Dough be Made Ahead?
Absolutely! The dough can be kept in the fridge for a day or two, or tightly wrapped and frozen for about a month. Just thaw it in the refrigerator before use, and fill the galette on the day you plan to bake it for best results.
Can the Dough be Made by Hand?
Yes, you can certainly make the dough by hand! If you have a pastry blender, perfect! If not, two table knives will work just fine to cut the butter into the dry ingredients.
How do you Store a Berry Galette?
This galette tastes best on the day it’s baked but can be stored at room temperature for one day. If you need to keep it longer, refrigerate it, as berry juices can soften the crust. You can also freeze it for up to three months—just thaw it overnight in the refrigerator and reheat at 375°F for about 10 minutes.
Can I Use Other Fruits Besides Berries?
Definitely! While berries are the traditional choice, you can use sliced and peeled fruits like peaches, apples, or pears. Just keep in mind that different fruits may require slightly different baking times.