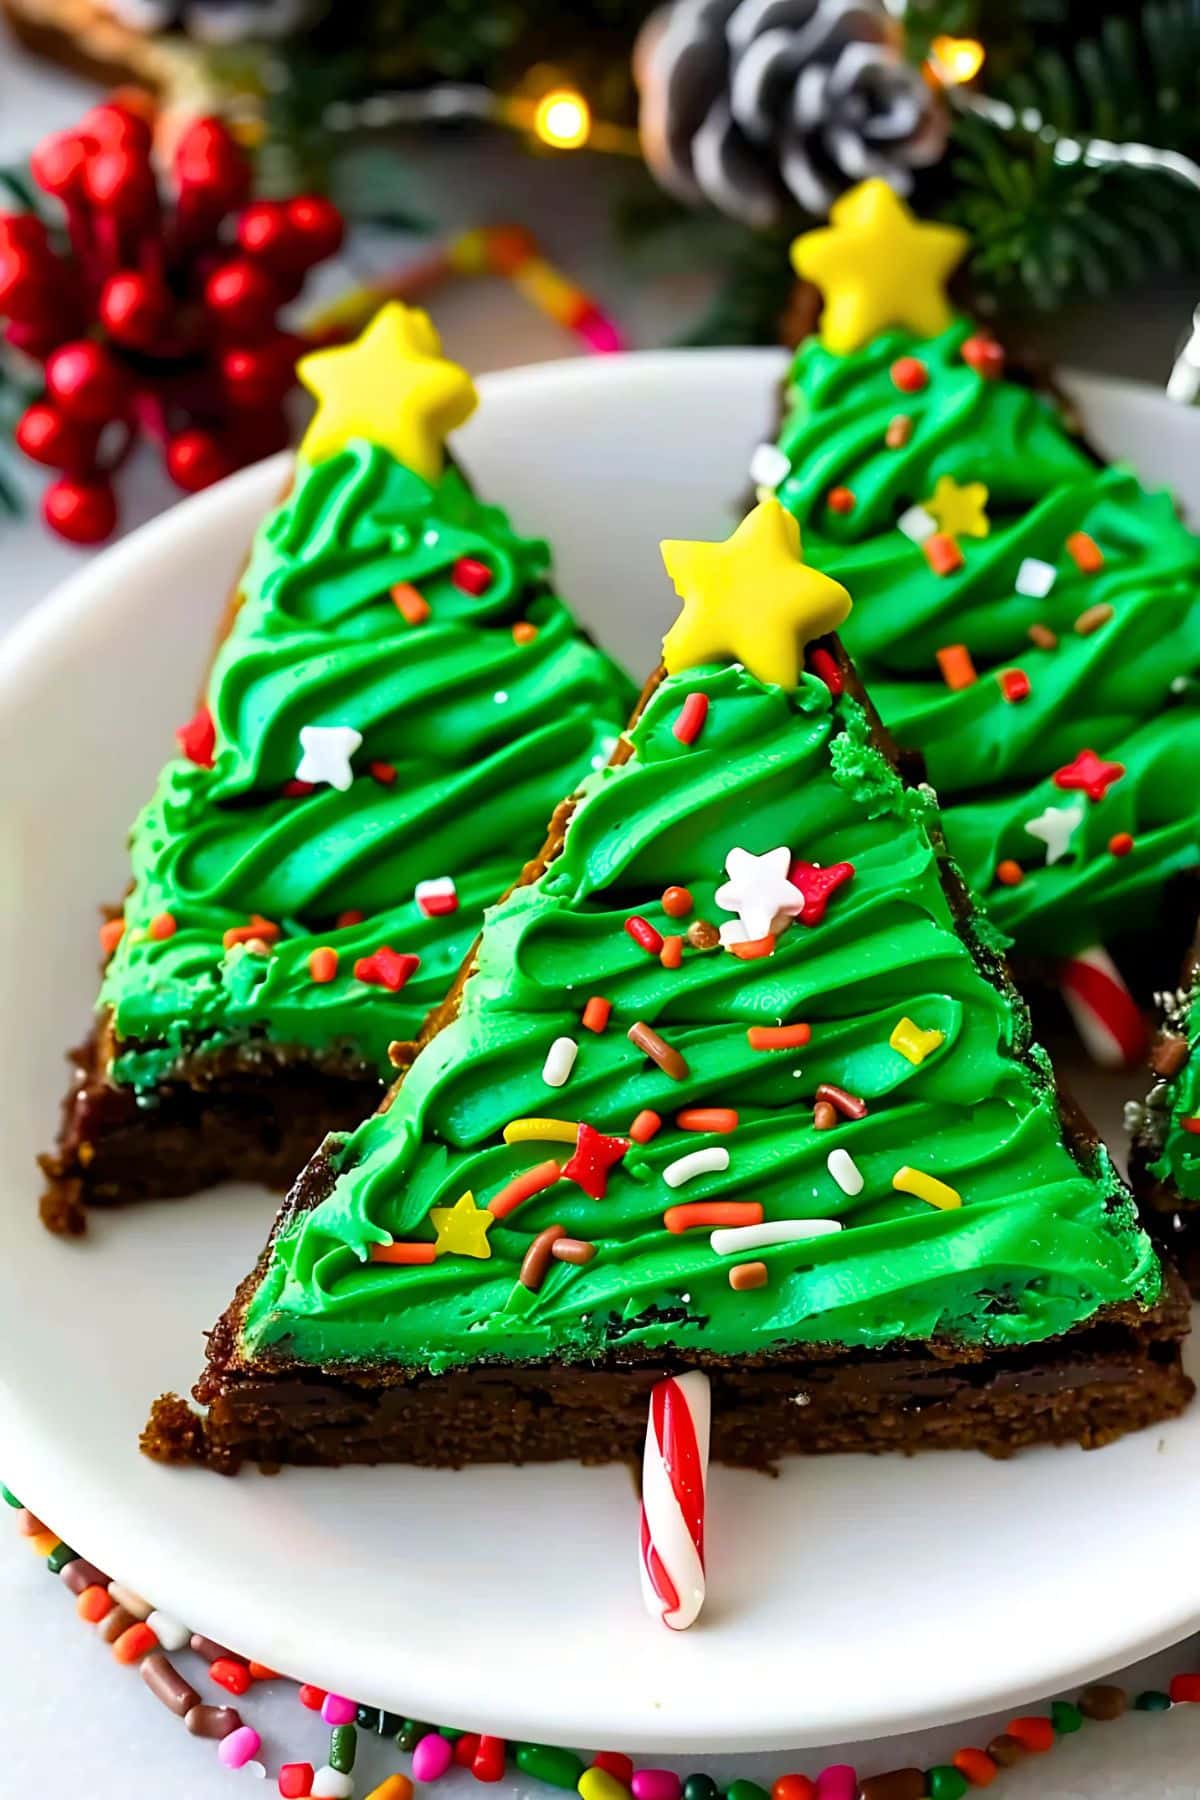
Delicious Christmas Tree Brownies
The holiday season is here, and what better way to celebrate than with these charming Christmas tree brownies? They are the perfect balance of rich and fudgy, topped with light and airy green vanilla frosting. A sprinkle of colorful decorations makes them look just like cheerful little holiday trees, complete with a candy cane trunk and a shining star on top. Get ready to impress your guests and delight your loved ones with these adorable treats!
These brownies are not only delicious but also a fun holiday project for families and friends. Whether you’re making them for a party or to treat your kids after a day of winter activities, these brownies are sure to spread joy and cheer!
Why You’ll Love These Christmas Tree Brownies
- Festive Treat: These cute, tree-shaped brownies are the perfect festive treat that can double as holiday decorations!
- Creative Activity: Enjoy time baking together with family, especially the little ones. It’s a delightful way to create special memories.
- Irresistible Taste: The rich and fudgy brownie base becomes even more indulgent with mini chocolate chips and creamy frosting.
- Customizable Creation: Personalize the aesthetics! Use your favorite candies, edible glitters, and unique toppings to make each tree special.
Ingredients
- All-Purpose Flour: The foundation for that perfect brownie texture.
- Unsweetened Cocoa Powder: Gives a deep, chocolatey flavor that’s hard to resist.
- Baking Powder: Helps the brownies rise slightly, ensuring a wonderfully fudgy texture.
- Salt: A pinch elevates the sweetness and intensifies the chocolate flavor.
- Unsalted Butter: Adds moisture and richness to the brownies and frosting.
- Granulated and Light Brown Sugar: Granulated sugar for sweetness, brown sugar for a hint of molasses and chewiness.
- Eggs: Essential for binding the ingredients together and providing structure.
- Vanilla Extract: Enhances the overall flavor with warmth and depth.
- Mini Chocolate Chips (Optional): For those little bursts of melty chocolate throughout the brownies.
- Green Frosting: To create those beautiful tree-like shades!
- Decorations: Range from sprinkles to edible glitters, candies, and more—let your creativity shine!
How to Make Christmas Tree Brownies
Get ready for a baking adventure that’s filled with holiday spirit! Here’s how to create these delightful desserts:
1. Preheat the Oven
Set your oven to 350°F (175°C). While it heats up, line a 9×13-inch baking pan with parchment paper and melt the butter in a medium saucepan over medium heat. Once melted, remove it from the heat.
2. Mix the Sugars
In the same saucepan, add the granulated sugar, brown sugar, and vanilla extract. Stir until everything is smoothly combined. Let this mixture cool slightly.
3. Incorporate the Eggs
Whisk in the eggs, adding them one at a time, mixing thoroughly until completely blended.
4. Combine Dry Ingredients
In another bowl, sift together the flour, cocoa powder, baking powder, and salt. Gradually fold this dry mixture into the wet ingredients. Be gentle—just mix until you see no more dry flour! If desired, stir in mini chocolate chips at this point.
5. Bake the Brownies
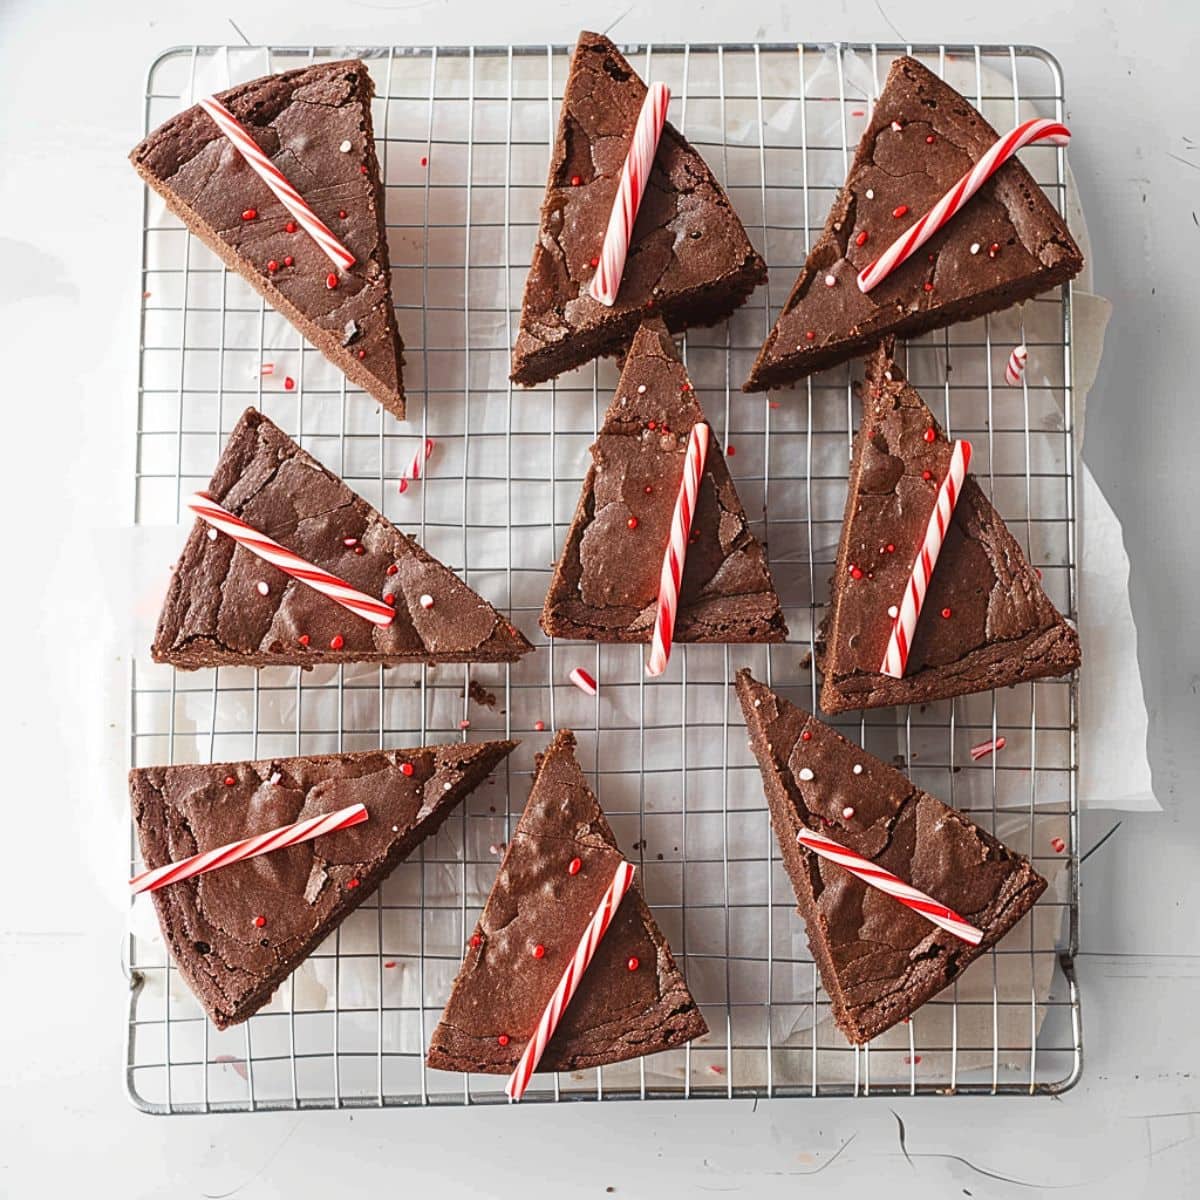
Pour the brownie batter into your prepared pan and spread it out evenly. Bake for 25 to 30 minutes. Test for doneness by inserting a toothpick into the center—if it comes out with moist crumbs, it’s ready! Allow the brownies to cool completely in the pan.
6. Make the Frosting
In a large mixing bowl, beat the softened butter until creamy and smooth, about 2-3 minutes. Gradually add powdered sugar, mixing after each addition. Add the vanilla extract and 2 tablespoons of milk or cream. Continue to beat until the frosting is light, fluffy, and spreadable, around 3 minutes. Gradually mix in green gel food coloring until you reach your desired shade of green.
7. Cut and Decorate
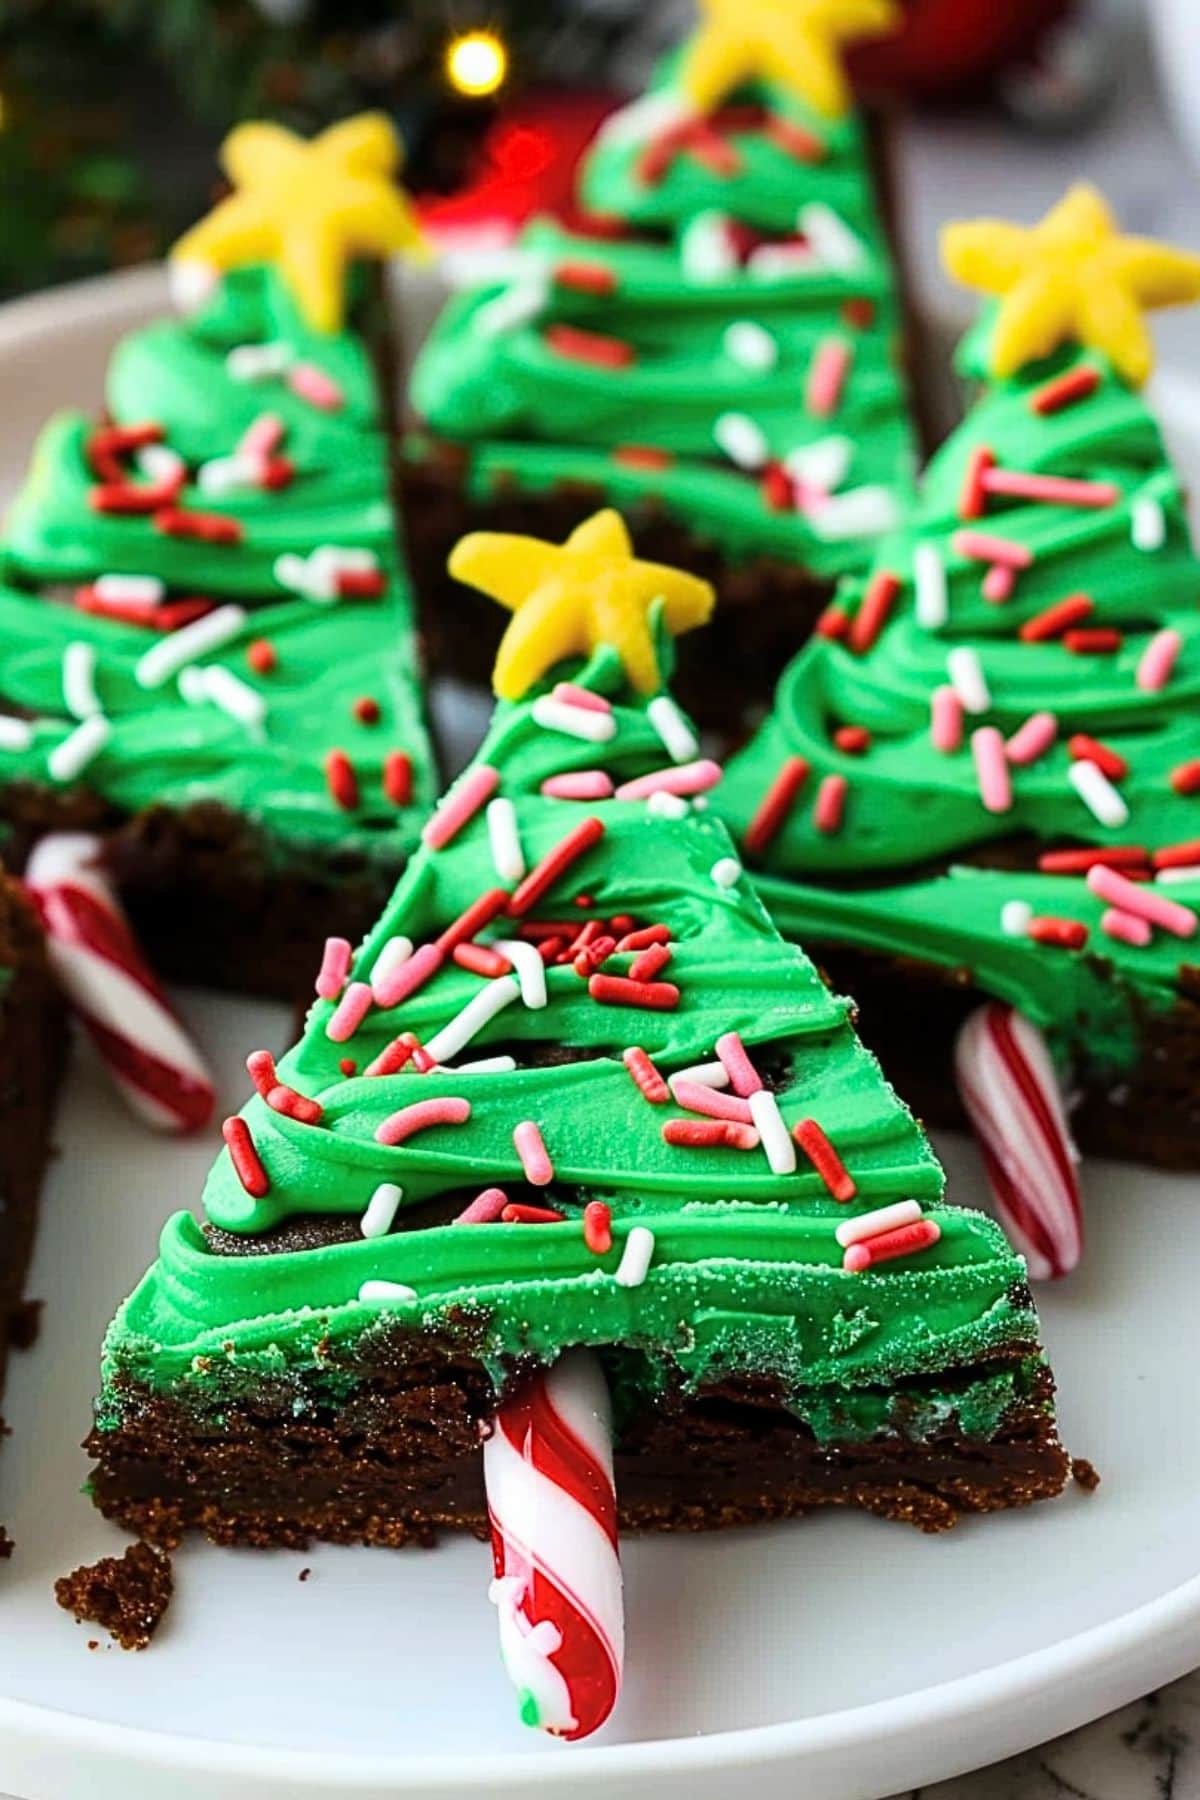
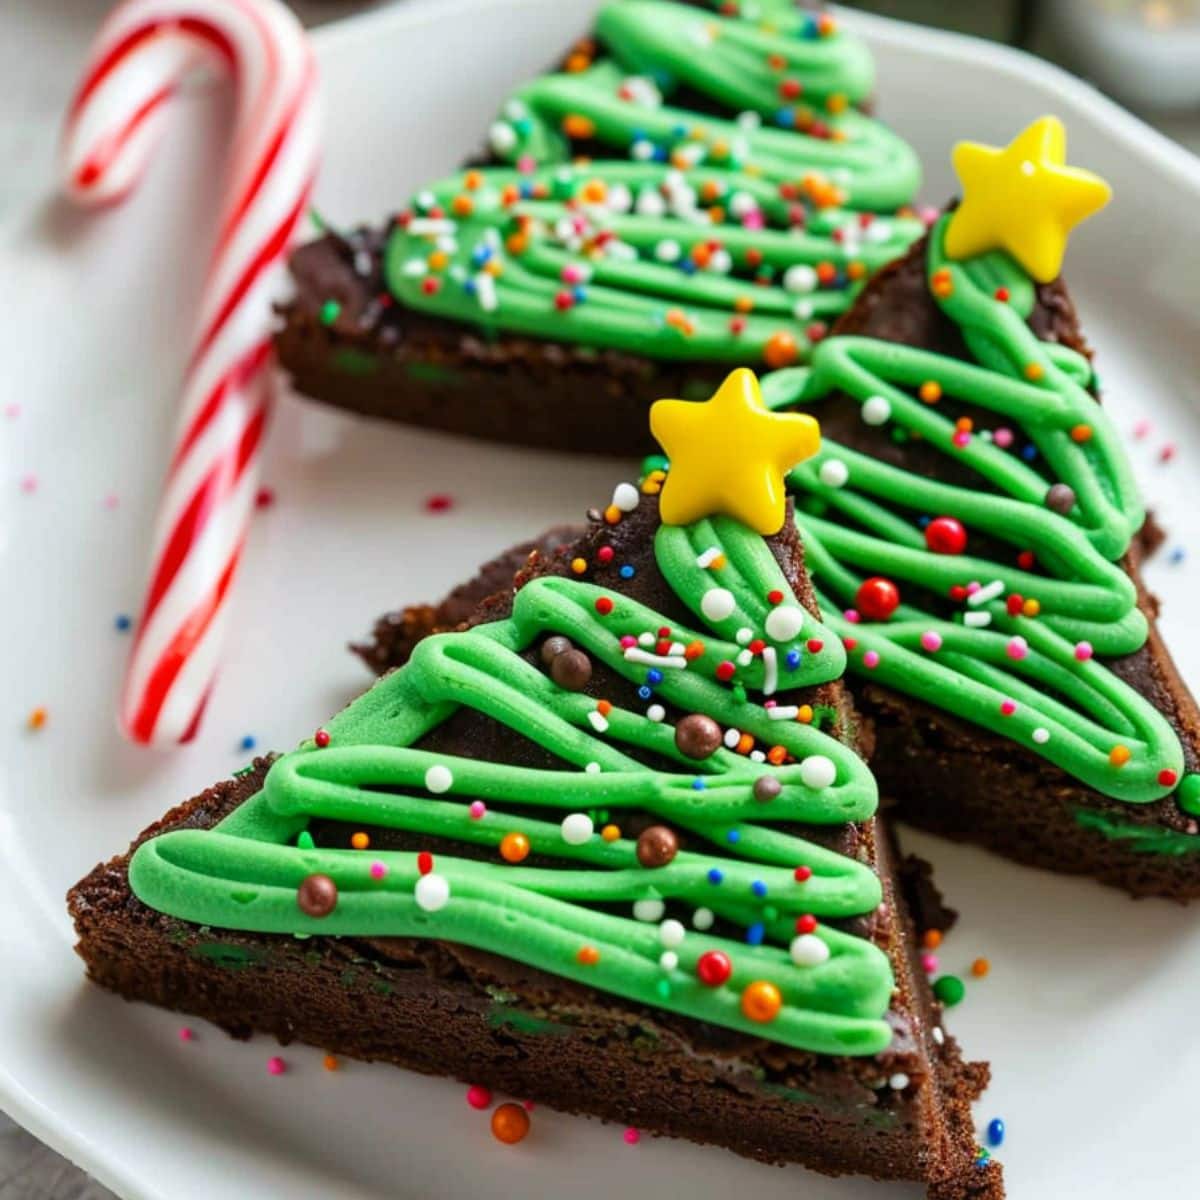
Slice the cooled brownies into triangle shapes. For the “trunk” of each brownie tree, attach a mini candy cane at the base with a tiny dollop of green frosting. Pipe the green frosting over the brownie triangles in a zigzag pattern to mimic tree branches or garlands.
8. Finish with Flair
Adorn your brownies with colorful sprinkles and place a star candy or yellow M&M on the peak of each tree. If you want to get extra festive, consider drizzling white chocolate for a snowy appearance. Let the decorations set for about 15-20 minutes, then they’re ready to serve!
Tips for the Best Christmas Tree Brownies
To ensure your holiday brownies are a hit, here are some handy tips to keep in mind:
- Quality Ingredients: Opt for high-quality unsweetened cocoa powder to enhance the chocolate flavor.
- Measure Accurately: Use proper measuring cups and level off your dry ingredients for the best texture.
- Don’t Overmix: Gently fold the dry ingredients into the wet mixture—overmixing can lead to dense brownies.
- Perfect Cuts: Chill the brownies for about 30 minutes before cutting them for neat triangles. Use a hot knife to get clean slices.
- Piping Techniques: Use a piping bag to create beautiful designs with the frosting—start from the bottom and go upwards.
- Decorate Wisely: Begin with larger decorations and add finer ones last for a polished look.
- Shortcuts: If you’re short on time, use a boxed brownie mix and store-bought frosting for a quicker solution, while still enjoying the decorating fun.
- Get Creative: Experiment with different decorations, like crushed peppermint, chocolate shavings, or alternative frosting colors!
How to Store
If you’re making these in advance for a holiday gathering, here’s how to keep them fresh:
To Store: Place the decorated brownies in an airtight container. They can be refrigerated for up to one week.
To Freeze: Wrap each undecorated brownie triangle tightly in plastic wrap, then place them in a freezer-safe bag or container. They can be frozen for up to three months. Just decorate them again after they’ve thawed!