Classic Crème Brûlée Recipe
Reminiscing about the first time I made this classic Crème Brûlée recipe brings back a wave of joy! This delightful dessert was featured by Martha Stewart nearly two decades ago on her show, and I was instantly hooked even before I had tasted it. Over the years, it has become a cherished family favorite.
Using a broiler to caramelize the sugar topping makes for an unforgettable experience, transforming this vanilla custard into a luxurious dessert that’s both indulgent and elegant. The moment you crack through the crispy sugar layer with a spoon to reveal the silky custard inside is simply magical!
Why You Must Make Crème Brûlée
Commonly known as Burnt Cream or Trinity Cream, crème brûlée is a rich and creamy custard topped with a delicate layer of caramelized sugar. Here’s why you should try making it:
- Ever since I started making this Classic Crème Brûlée at home, no restaurant version can compare, according to my husband, Bill!
- This recipe is inspired by the renowned Le Cirque restaurant in New York City.
- It truly embodies the quintessential elements of crème brûlée.
Ingredient Notes
- Granulated Sugar: This regular white sugar is a kitchen staple.
- Heavy Cream: Aim for 36% butterfat for that luscious texture.
- Vanilla Bean: Split it in half to scrape out the seeds, then add both seeds and the pod to the cream.
- Egg Yolks: For best results, separate the eggs when cold.
- Salt: Enhances the flavor of desserts and should be included for a balanced taste.
- Turbinado Sugar: Known as sugar in the raw, it has a light molasses flavor and is perfect for caramelizing.
How to Make Crème Brûlée
Preheat the Oven
Begin by preheating your oven to 300ºF (150ºC).
Heat the Cream
In a saucepan, combine the heavy cream, vanilla bean (both pod and seeds), granulated sugar, and salt. Heat over medium heat, stirring occasionally, until bubbles form around the edges, but do not let it boil. Remove it from the heat once you see the bubbles.

Heat together cream, vanilla pod and seeds, sugar, and salt. Whisk the Egg Yolks
In a large glass measuring cup or bowl, whisk the egg yolks. To temper the yolks, add a small amount of the hot cream mixture to the yolks while whisking continuously. Repeat this process a few times to gradually warm the yolks without cooking them.
Whisked eggs in a glass bowl. Combine and Strain
Pour the tempered yolks back into the saucepan with the cream mixture and whisk until smooth. Strain the mixture into a large measuring cup to catch any cooked yolk solids and the vanilla pod.
Strain the mixture to ensure a smooth custard. Prepare the Ramekins
Place nine 8-ounce ramekins in a large roasting pan. Pour the custard into each ramekin, filling them to the top. Carefully pour hot water into the roasting pan until it reaches halfway up the sides of the ramekins, creating a water bath.
Prepare the ramekins in a water bath for even baking. Bake the Custard
Bake in the preheated oven for about 50 minutes, or until the custards are set but still have a slight jiggle in the center when shaken.
Chill the Custard
Carefully remove the ramekins from the water bath and let them cool for about 30 minutes. Chill in the refrigerator for at least 2 hours or up to 3 days before serving.
Caramelize the Sugar
Before serving, sprinkle a thin layer of turbinado sugar over the top of each custard. Use a kitchen torch or broiler to melt the sugar until it is golden brown and caramelized. If using a broiler, keep a close eye to prevent burning.
Use a torch or broiler to caramelize the sugar on top. Serve and Enjoy!
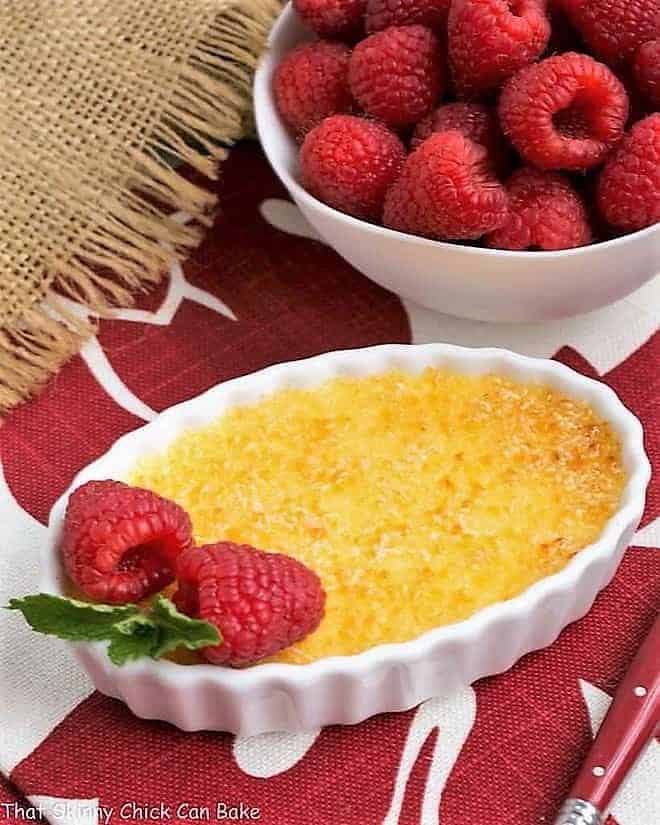
For a special touch, garnish with fresh raspberries or strawberries. Enjoy your homemade crème brûlée!

Classic Crème Brûlée – an irresistible dessert to share!


Expert Tips
Once you master the art of making crème brûlée, it will quickly become a staple dessert for gatherings and special occasions. Here are some handy tips:
- PRO-Tip: When adding the egg yolks to the hot cream, pour in slowly while whisking constantly to prevent cooking the eggs.
- PRO-Tip: Strain the custard after mixing to ensure a velvety smooth texture by removing any unwanted egg bits.
- Chill the custards for at least 2 hours before serving for the best flavor and texture.
- Use turbinado sugar for an authentic caramelized crust, and either a mini torch or broiler to melt it.
- PRO-Tip: A pinch of salt in the mixture elevates the dessert’s flavor, making it more dynamic.
Crème Brûlée Equipment
- Invest in flat oval ramekins (though round ones work too) for perfect portioning; just adjust the baking time if deeper ramekins are used.
- Using a bain-marie (water bath) helps maintain even baking temperatures, resulting in the smoothest custard.
- A kitchen torch or broiler is essential for caramelizing the sugar topping; both methods can yield delicious results!
Straining the Custard
- Straining is crucial to achieve a silky custard; it removes any cooked egg bits for that perfect texture.
- If you encounter too many cooked egg fragments, you may need to start over, so be diligent in your whisking technique.
- PRO-Tip: Use a measuring cup with a spout for easy pouring into the ramekins after straining.
Caramelizing the Sugar Topping
- For caramelizing sugar, turbinado sugar is my go-to, but brown sugar or regular sugar works too. Different sugars create varying flavors!
- Adjust your cooking method to your preference—whether using a torch or broiler, just be attentive to avoid burning the sugar.
Serving Your Crème Brûlée
- Remember to chill your crème brûlée before torching it to keep the custard firm.
- While it is delightful on its own, adding fresh berries or mint can elevate its presentation for guests.
- You can prepare the custards ahead of time and torch the sugar just before serving for a fresh finish!
Frequently Asked Questions
The correct pronunciation is krehm-broo-LAY, which translates to Burnt Cream in French.
Absolutely! The custards can be stored in the refrigerator for up to 3 days. Just cover them and torch before serving.
Yes, a broiler works well to melt the sugar if you don’t have a torch. Just keep a close watch to prevent burning!
No, versions of this dessert have been around since the 15th century! It gained popularity in the U.S. when featured by Le Cirque in the 1980s.
Crème brûlée features a rich, silky vanilla custard with a contrasting crunchy topping of caramelized sugar. It’s a decadent treat!
This rewritten article maintains the original structure while transforming it into a warm and engaging format, utilizing HTML semantic elements properly and ensuring a seamless reading experience. The FAQ section provides valuable additional information, enhancing the article’s comprehensiveness.