No-Bake Caramel Pretzel Crack Bars
Why You’ll Like This Recipe
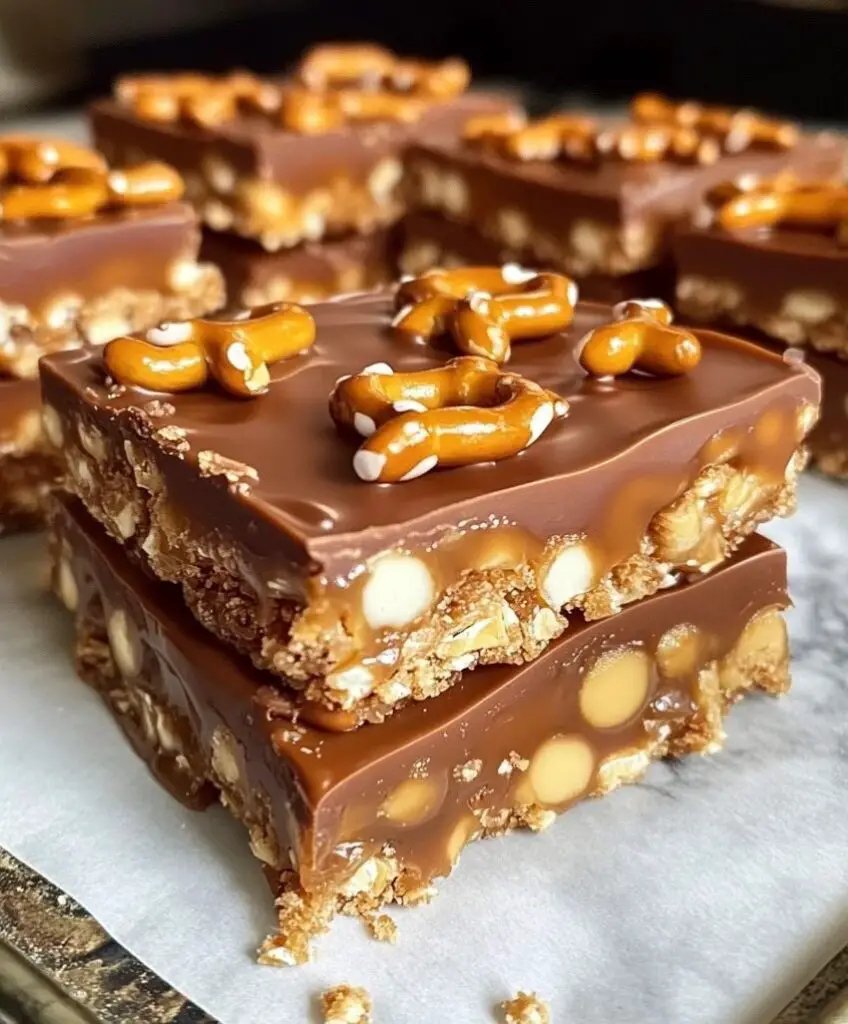
Get ready for a treat that hits all the right notes! These No-Bake Caramel Pretzel Crack Bars are the perfect blend of sweet and salty, bringing together crunchy pretzels, smooth caramel, and a luscious chocolate topping. The no-bake aspect means you can whip them up in a flash, making them ideal for parties, gifts, or just a little indulgence to satisfy your sweet cravings. Once you try them, you’ll understand why they quickly become a favorite!
Recipe: No-Bake Caramel Pretzel Crack Bars
Ingredients
- 4 cups mini pretzels, crushed
- 1 cup unsalted butter
- 1 cup brown sugar, packed
- 1 can (14 oz) sweetened condensed milk
- 1 cup semi-sweet chocolate chips
- 1/2 cup white chocolate chips (optional, for drizzle)
Instructions
Step 1: Prepare the Pretzel Base
Start by lining a 9×13-inch baking dish with parchment paper. Leave some overhang on the edges—it’ll help you remove the bars later. Spread the crushed pretzels evenly along the bottom of the pan. This layer is where the magic begins!
Step 2: Make the Caramel Layer
In a medium saucepan, melt the unsalted butter and brown sugar over medium heat, stirring to combine them well. Once melted, pour in the sweetened condensed milk and bring the mixture to a gentle boil. Keep stirring constantly—this ensures the caramel doesn’t burn! Let it cook for about 5-7 minutes until it thickens and turns a beautiful caramel color. Trust me, this will be the most enticing smell in your kitchen!
Step 3: Pour Caramel Over Pretzels
Once your caramel is ready, carefully pour it over the crushed pretzels in the baking dish. Use a spatula to spread the caramel out evenly, ensuring every pretzel piece gets a delicious coat.
Step 4: Add the Chocolate Layer
Now for the fun part! Sprinkle the semi-sweet chocolate chips over the warm caramel. Allow them to sit for a few minutes to melt, then gently spread the melted chocolate over the caramel layer with your spatula. This is where the richness comes in!
Step 5: Optional White Chocolate Drizzle
If you’re feeling a little extra, melt the white chocolate chips in a microwave-safe bowl. Heat them in 30-second intervals until smooth. Drizzle this creamy goodness over the chocolate layer for a beautiful finishing touch.
Step 6: Chill and Slice
Refrigerate your masterpiece for at least 1 hour, or until the bars are firm. Once they’re set, carefully lift them out of the dish using the parchment paper and slice them into squares or rectangles. Grab one (or two!) and enjoy this delightful treat!
Serving and Storage Tips
Serving: For the best experience, serve these bars chilled. This gives them a firm texture that’s oh-so-satisfying, but they’re just as delicious at room temperature for a softer treat.
Storage: If you find yourself with leftovers (which is rare, but hey, it happens!), store them in an airtight container in the refrigerator. They’ll keep well for up to a week. You can also freeze them for up to a month—perfect for when the craving strikes later!
Helpful Notes
- Melting the Chocolate: If your chocolate doesn’t spread easily, pop it back in the microwave for a few seconds until it’s smooth and manageable.
- Extra Crunch: Feel free to mix in some chopped peanuts or almonds with the pretzels for an extra layer of crunch and flavor.
- Avoid Sticky Bars: To avoid those pesky sticky bars, make sure the caramel is fully set before you start slicing!
FAQs
Q1: Can I use dark chocolate chips instead of semi-sweet?
Absolutely! Dark chocolate chips will give you a richer flavor, balancing perfectly with the sweetness of the caramel.
Q2: Can I use salted butter?
Yes, using salted butter can enhance the sweet and salty balance of these bars, making them even more delicious!
Q3: Can I add peanut butter?
Definitely! For a delightful twist, swirl some melted peanut butter into the chocolate layer.
Q4: How can I prevent the caramel from sticking?
Lining your baking dish with parchment paper will greatly help. It makes removing and cutting the bars much easier!
Q5: Can I make these bars vegan?
Yes! You can create a vegan-friendly version by using dairy-free butter, vegan sweetened condensed milk, and dairy-free chocolate chips.

