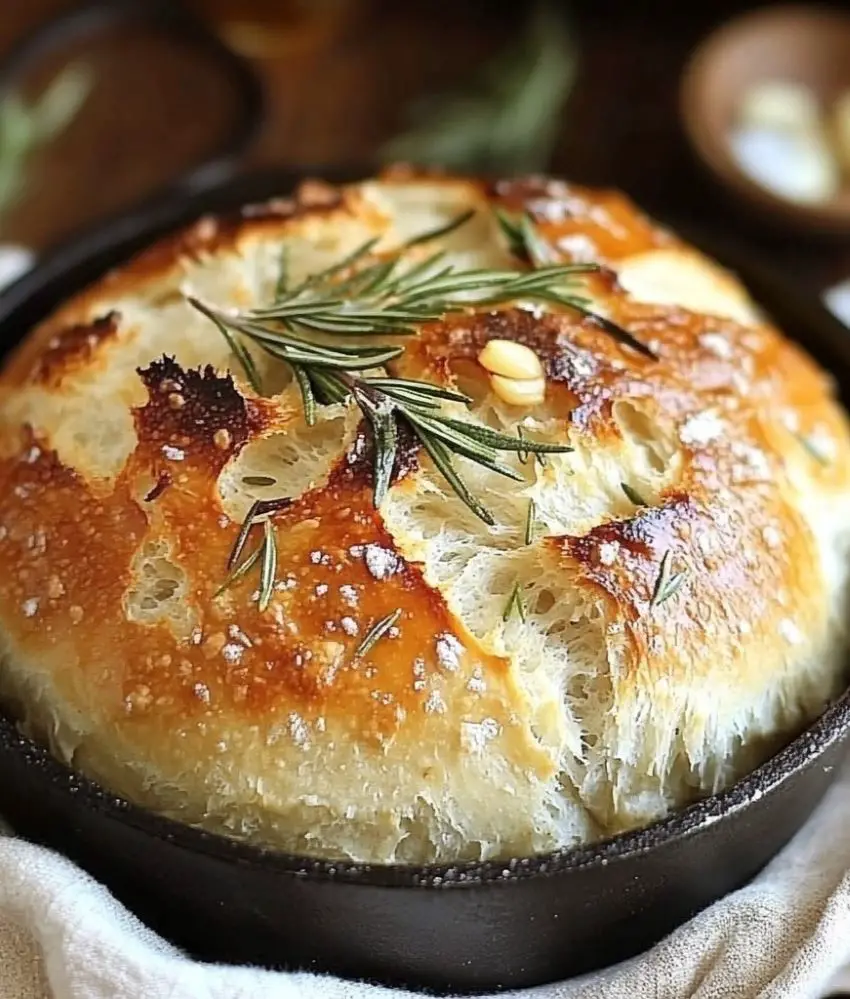
Rustic No-Knead Rosemary Garlic Bread
If there’s anything that can instantly transform your kitchen into a warm, inviting space, it’s the sumptuous aroma of freshly baked bread. One of my all-time favorite recipes that encapsulates this magical experience is Rustic No-Knead Rosemary Garlic Bread. This delightfully simple recipe not only boasts remarkable flavor but also fills your home with the irresistible scents of rosemary and garlic. Let’s dive into how this has become my go-to recipe for every occasion!

My journey into bread-making has been a mix of thrill and experimentation. Discovering no-knead bread was a true game-changer for me—requiring minimal effort but delivering stunning, bakery-quality results right from my home. Let’s explore the story of how this rustic bread recipe became a regular feature in my kitchen.
My First Attempt at No-Knead Bread
When I first tried my hand at no-knead bread, I had my doubts. Could such straightforward ingredients lead to a crusty, artisan loaf that would rival those from bakeries? With only a handful of components and no elaborate gadgets, I decided to take the plunge.
As I extracted my very first loaf from the oven, I was genuinely shocked. The loaf’s golden, crispy crust looked like it belonged in a gourmet cookbook, while the inside was soft and airy with a perfect chew. The addition of rosemary and garlic transformed this simple loaf into something extraordinary.
Ever since that remarkable first attempt, this bread has adorned my table for everything from cozy family dinners to festive gatherings.
Ingredients
- 3 cups all-purpose flour
- 1 1/2 teaspoons salt
- 1/2 teaspoon instant yeast
- 1 1/2 cups warm water (110°F/45°C)
- 2 tablespoons fresh rosemary, chopped
- 3 cloves garlic, minced
- 1 tablespoon olive oil
Directions
Step 1: Combine Ingredients
In a large mixing bowl, start by combining the flour, salt, and instant yeast. Add the fresh rosemary and minced garlic to the mix, ensuring they are evenly distributed. Then pour in the warm water, using a wooden spoon or your hands to stir until the mixture comes together into a shaggy dough.
This step reminds me just how forgiving no-knead bread can be—there’s no pressure to achieve perfection; just mix until everything is harmoniously combined.
Step 2: Let It Rest
Cover the bowl with plastic wrap or a clean kitchen towel and let it rest at room temperature for 12 to 18 hours. This extended rise is essential for developing the bread’s wonderful texture and flavor.
I vividly remember the first time I made this bread—peeking under the towel, I was mesmerized by how dramatically the dough transformed. By morning, it had nearly doubled in size, with delightful bubbles forming on the surface—a clear indication of a successful rise!
Step 3: Shape the Dough
Once the dough has risen, sprinkle some flour on your work surface and gently transfer the dough onto it. With lightly floured hands, shape the dough into a round loaf. There’s no need for elaborate kneading—just a few gentle folds will suffice to create some structure.
Next, place the dough on a piece of parchment paper and let it rest for an additional 30 minutes while your oven preheats.
Step 4: Preheat the Oven and Dutch Oven
Preheat your oven to 450°F (230°C). Also, place a Dutch oven with its lid inside the oven while it heats up for at least 30 minutes. This preheating creates a hot, steamy environment essential for achieving that perfect crust.
The excitement builds as I look forward to the next phase; knowing I’m about to bake something so satisfying adds to the thrill.
Step 5: Bake the Bread
Carefully remove the hot Dutch oven from the oven and transfer the dough (along with the parchment paper) into it. Cover with the lid and bake for 30 minutes.
After 30 minutes, remove the lid and continue baking for another 15 minutes, or until the crust reaches a golden brown color and develops a beautiful crackly texture. The aroma of rosemary and garlic wafting from the oven at this point is simply divine.
Step 6: Cool and Enjoy
Once baked, take the bread out of the Dutch oven and place it on a wire rack to cool for at least 10 minutes before slicing. This step is vital as it allows the interior to settle and achieve the ideal texture.
Tips for Perfect No-Knead Rosemary Garlic Bread
- Use Fresh Ingredients
Fresh rosemary and garlic greatly enhance the flavor of the bread, offering a fragrant and savory experience. - Don’t Skip the Long Rise
Allowing the dough to ferment for an extended period is essential for building its rustic texture and complex flavors. Be sure to plan ahead! - Use a Dutch Oven
A Dutch oven retains steam during baking, resulting in a beautifully crusty exterior while keeping the inside tender and airy. If you lack a Dutch oven, an oven-safe pot with a lid will suffice. - Experiment with Add-Ins
While rosemary and garlic are classic choices, feel free to get creative and try different herbs, grated cheeses, or even sun-dried tomatoes. - Store Properly
To maintain the bread’s scrumptious crust, store it in a paper bag. For longer enjoyment, wrap it tightly and freeze.
Why I Keep Coming Back to This Recipe
Making this wonderful bread has evolved into a cherished ritual for me. There’s a meditative quality to mixing the dough in the evening, allowing it to rise overnight, and finally baking it the next day. This recipe’s simplicity allows me to immerse myself in the joy of baking, free from the burden of complicated steps.
This bread has graced numerous family tables, accompanying everything from hearty soups to celebratory spreads during holidays. It’s also my favorite gift to share—there’s nothing quite like presenting someone with a warm loaf of homemade bread, neatly wrapped in parchment with a sprig of rosemary on top.
Final Thoughts
Rustic No-Knead Rosemary Garlic Bread is more than just a recipe; it’s a celebration of simplicity and the delight of creating something with your own hands. It gently reminds us that, even in our fast-paced lives, there’s profound value in slowing down and savoring the process.
Whether you’re a seasoned baker or just dipping your toes into bread-making for the first time, this straightforward recipe is bound to impress both yourself and those lucky enough to share in your creation. The delightful combination of a crisp crust, tender interior, and aromatic herbs will have you returning for more every time.
So, gather your ingredients, mix up some dough, and let the enchantment of this bread fill your kitchen with warmth and love!


